Thursday, June 14, 2012

Fave Things Thursdays: Pillows


No comments
It's time again for some weekly Pinspiration. Today's fave thing is something that has been a big project on my to-do list for quite some time. Pillows! There's only one problem. I have not the slightest clue how to use a sewing machine. Teaching myself to sew is also on the to-do list. I am in desperate need for new couch pillows for our future apartment and there's so much great diy inspiration out in craft world that I would feel like I was betraying my love for crafts if I just went and bought some plain, boring, store pillows. Just saying. So, to get on with my post, here are a few a bunch of my favorite diy pillow ideas!

Word pillows

[source]

Stenciled pillows
[source]

Ruffled Flower pillows
[source]

Pleated pillows
[source]

Fringe pillows
[source]

Rosette and Burlap pillows
[source]

Bow pillows
My love for bows would probably be considered a problem to most people
[source]

Fabric flower pillows
Words cannot describe how beautiful I think this is!
[source]

And because nothing is complete without a little chevron print
Chevron pillows
[source]

 Well, that's all I have for today's fave things post! Hope everyone has a great weekend!


Tuesday, June 12, 2012

Tutorial Tuesday #2


4 comments
Pin It
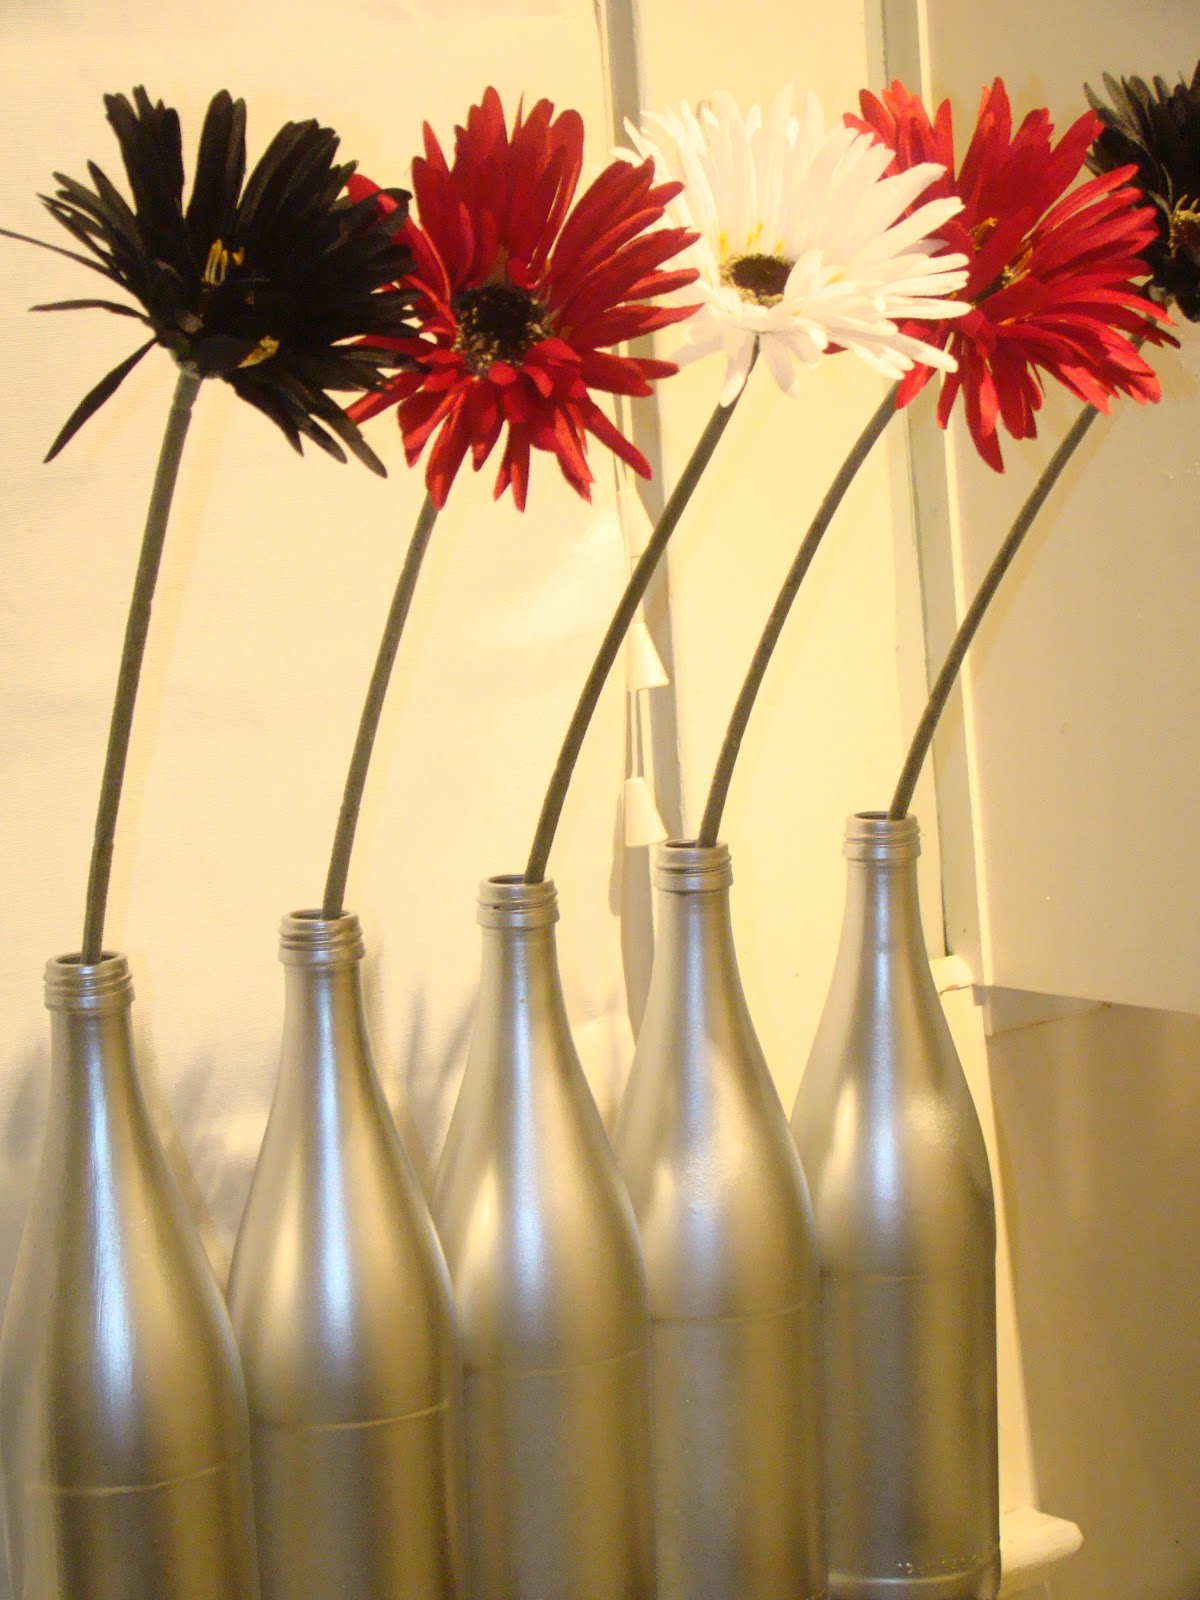
Happy Tuesday everyone! This is only my second Tutorial Tuesday and I already almost started slacking. The original project I had planned for today still needs to be hung so I can take pictures of it.  What's sad is that I was just at Wal-Mart today and didn't remember to get something to hang it with. But hey, if that's the only thing I forgot, I feel like I'm in pretty good shape. Today's new project was, of course, inspired by the one and only Pinterest. Lately, I've been admiring the millions of ways people have come up with to recycle their old wine bottles and I wanted to jump on the bandwagon to make vases for my kitchen. Seeeee?


There was only one problem, though. I don't buy wine so I didn't have old wine bottles. I ended up finding the perfect solution to my wine bottle woes! The grocery store sells glass bottled water for about a dollar a piece! Score. I did get some funny looks for buying glass bottled water though. Someone even asked me if it tastes different than regular water....
 

So, I drank the water, took off the labels (with Goo-Gone), and then got to crafting. And for those wondering, it tasted like regular water ;)


I decided these would look perfect as vases on top of our kitchen cabinets. There's nothing up there except some dust and it was just another way to spice up the kitchen. So, I spray painted them to match.


I first primed them with black primer.

Then, I spray painted them with a metallic finish. Metallic is always fun.


And there you have it, "wine bottle" vases. Easy peasy and not quite as creative as some of the others on Pinterest. Eh, whatever.


And this is their new home :)

I kind of love them. Except, the first time I walked into the kitchen after putting them up there, it kind of scared me because I forgot they were there. 

Hope everyone's having a great week! :)


Thursday, June 7, 2012

Fave Things Thursday


3 comments
This is another one of those new things I'm trying. Since a lot of my inspiration comes from Pinterest, Thursdays (or most, anyways) will be dedicated to the things that I find ever so inspirational. And, also in most cases, I'll link to them when I can. And just as a fair warning, some of these things may also relate to my next Tutorial Tuesday posts. :)

Today's inspiration is for the kitchen. In order to want to be in the kitchen (aka - COOK), I need to at least be surrounded by pretty colors/decor. I mean, who wants to cook in a drab kitchen (let alone, cook at all)? Am I right? One of my favorite kitchen decor trends right now is the "EAT" decor everyone seems to be buying or diy-ing. (Hey, that rhymed.) There are so many different and fun ways to make it suit your kitchen and these are the ones I really like.

How cute is this one with the spoon and fork?

Pinned Image

I pretty much love turquoise anything

Pinned Image

How adorable is the coral bunting above this one?

Pinned Image

I love the metallic look of this one

Pinned Image

Buttons!

Pinned Image

Last but not least, how sweet are these jars?

Pinned Image

I will somehow or another be incorporating the EAT decor in my kitchen. Granted, mine probably won't be anything extravagant but I think it will look great with the spoon, fork and knife frames I already have hanging on the wall. Picture of that to come soon!

Happy Thursday everyone!


Tuesday, June 5, 2012

Tutorial Tuesday #1


8 comments
Pin It
So, I've decided to try a weekly theme to help me stay motivated to update my blog and give it a little more organization. It may also help me branch out and post about things other than just crafts. I mainly hope this helps when school starts back in August. But for now, I don't want to think about school. As you can see, today is my first "theme" - Tutorial Tuesdays. Since this was kind of a spur the moment idea, today's tutorial isn't anything special. In fact, I've actually already done it before with my Muggle T-shirts. 

The BFF and I spent the last 2 weeks of school before summer making and re-making our summer bucket lists. We're slightly crazy, we know. The biggest thing on our bucket list was crafting, crafting, and more crafting. (Remember the last item on my summer bucket list post?) Mainly because we spent so much of our study time whining about how we would rather be crafting. So, here's to getting it out of our system. 

After deciding our whole summer would be spent crafting, we also decided we needed appropriate T-shirts for the occasion. Why? Because we are super duper cool. That's why. See?


We got the inspiration from all of the "Keep Calm" posters always seen on Pinterest and in the blog world and used the same technique as my Muggle shirts I made for the Harry Potter and the Deathly Hallows Part 2 premiere.  We were actually able to find and downloaded the Keep Calm font. I then used my Cricut and the Sure Cuts a Lot software I have on my computer. The only problem with this is that the SCAL only works with the hardware on the Cricut Personal (the first one ever made). Although, this was much easier than printing it out and cutting the font with an X-acto knife, the X-acto knife method will still work, but will require much more patience. Then we ironed the words on and went to painting.


And these were our final results!


I think we are all set to craft away the summer. What do you think?
Happy Tuesday!!


Saturday, June 2, 2012

Lamp Upcycle


5 comments
Pin It
I can't believe I've already been out of school for a week. I wish I had more to show for it. But instead I spent this past week moving and sleeping. So exciting right? No. Because I hate moving. It's just so draining. Not to mention, I'm about one empty toilet paper roll short of being a hoarder. I should really work on that. 
In between my exciting regimen of moving and sleeping, I found the time to redo one of our lamps that the fiance has been using in his apartments since undergrad. Honestly, there was nothing wrong with it. Except for the shiny brass. I never knew how much I hated the brass look, until this lamp. It's just so....shiny. I mean, just look at it. (And while you're at it, go ahead and adore my super awesome Aubie frame that the fiance got me when I graduated from Auburn. There's not much else I love more than Aubie. Except, maybe penguins).


Call me weird, I don't care. It just didn't go well with the rest of the living room decor in our future home. So, I asked him if it could be one of my projects, and much to my surprise, he didn't hesitate to tell me to have at it.


And needless to say, both of us (mainly me) are stoked at how it turned out. He's not real big on the flower I decided to add. Then again, he's not a girl. So I guess I can understand. Today's post is to show you how I did it. Because maybe you have a shiny brass lamp you don't want hanging around anymore. Who knows.

What I used:


A new lamp shade (size small)
Black ribbon
Black felt
 Pearls/beads
Black primer
Black satin spray paint
Scissors
Hot glue gun

How To:

The first thing I did was take off the lamp shade


This lamp had a harp but my new lampshade didn't require one. And I absolutely had no idea you could take it off until my father-in-law-to-be taught the fiance this nifty trick. Basically, you push up the two little pegs at the bottom and pinch in both sides until it comes off. Cool, eh?


And now, you have a regular lamp


I then took off the light bulb and taped the cord so I didn't accidentally spray paint it. And finally, it was time for the fun part. Spray painting! I did one coat of the black primer and then one coat of the black glossy. 


While I let that dry, I got busy on decorating the lampshade.


I also had to look up how to make the type of flower I wanted. I ended up finding my tutorial here and I printed out the template. Next, I traced the shapes onto my black felt with a silver pen and cut them out. I used the second largest template for my bottom petals and then cut one of each of the three smallest templates. After I cut them out, I used hot glue to layer them and used three pearls for my center. I used my black ribbon to add a trim to the top and bottom of my lamp and I just hot glued it down as I wrapped it around. The last things I did were hot glue my finished flower to the front and put the lamp shade on the base.

Funny story: While in the process of cutting my layers, the fiance didn't understand why I was cutting out clovers.  He said it looked like we were going for a morbid Irish theme. Just a word of advice - Don't ask for a male's opinion until the project is complete. They seem to have a hard time visualizing things.


We officially have a brand new lamp and I pretty much love it. And even if he won't admit it, I know the fiance loves it too. :)

Happy weekend!


LinkWithin

Related Posts Plugin for WordPress, Blogger...