Showing posts with label life. Show all posts

Tuesday, August 7, 2012

Tutorial Tuesday #8: More Upcycle Frames


1 comment
Hey again! Today's post isn't anything very special. In fact, I shouldn't even label it a tutorial. I've been working on more wedding stuff, mainly gifts, but I can't post about them quite yet! I'm pretty sure I mentioned in my last upcycled frame post that I had a bunch of other regular photo frames to use for the wedding that I wanted to spray paint brown. Well, I finally am getting around to posting pictures of those.

Basically it started with a bunch of $0.39-$0.59 thrift store frames that looked like this


I tried really hard to pick out frames with some sort of detail around them because it just looks a lot nicer to me. I first sprayed them with gray primer. Notice how spotty it looks? Yeah, well that's because I ran out of the primer. I'm pretty sure I used up every last drop.


The last thing I did was spray them with 2 coats of Krylon "Brown Leather."  I added some of our engagement photos and I now have some more decor for the wedding!


Just 66 more days to go! Hope everyone has a wonderful rest of the week!


Monday, July 16, 2012

Bachelorette Weekend


2 comments
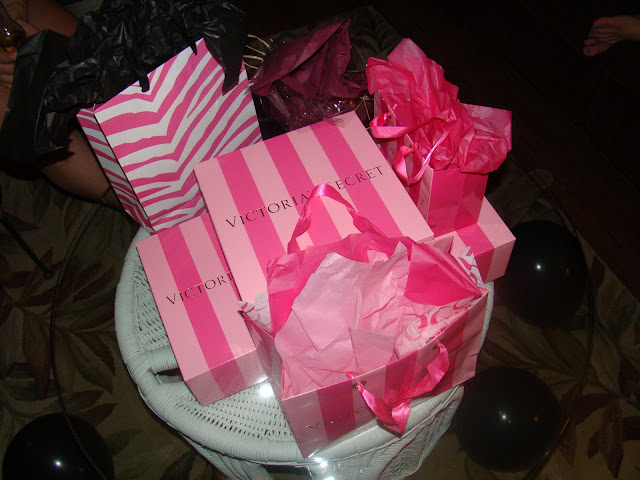
Sorry for being MIA last week. I spent most of last week assembling invites and getting ready for my bachelorette party this past weekend. Needless to say, my sister did a great job and we had a nice, relaxing weekend. Oh, and thanks to the future in-laws for letting us borrow their condo in PCB. Here are a few of my favorite pictures from the weekend! 

Our door sign
 

My sister's beautiful cupcake display
Oh, and the cups in this picture I ended up making as a gift for all the girls that came. Tutorial post to come!


The pretty banner she and a friend made! Also make note of my creepy friends in the bottom right corner. 


Of course I had to take a picture of the pretty napkins and my card


Chips and dip, chicken and cheese crescent roll-ups, and buffalo chicken dip. It's making my mouth water just to see this picture. It was all so delicious.
 

Our chocolate fondue we had for dessert the second night. Noms.


Told you she did a fabulous job. I couldn't ask for a better maid of honor!

Pool time


Hanging out on the beach the first night
My sis also made that sash!
 

Sisters
 

Our condo neighbors and all my girls
 

She loves me
 

My Auburn loves
 

Lingerie ;)
 

My awkward palm-tree. I'm truly the most awkward person ever
 

They wrote down my silly quotes while opening my lingerie and read them back to me as "What I'm going to say on our wedding night." So funny. Everyone should do this.
 

This was my reaction. I mean seriously people, you cannot make this up.
 

Beach day!


Drive to dinner
 

The group at Spinnaker's
 

Helping me make a crown out of toilet paper to cross off my list
 

The finished product
 

So there you have it! A little glimpse of my bachelorette weekend! If I post anymore, it'll give too much away ;) Now if October would just get here already! Hope everyone had a happy Monday!


Saturday, June 2, 2012

Lamp Upcycle


5 comments
Pin It
I can't believe I've already been out of school for a week. I wish I had more to show for it. But instead I spent this past week moving and sleeping. So exciting right? No. Because I hate moving. It's just so draining. Not to mention, I'm about one empty toilet paper roll short of being a hoarder. I should really work on that. 
In between my exciting regimen of moving and sleeping, I found the time to redo one of our lamps that the fiance has been using in his apartments since undergrad. Honestly, there was nothing wrong with it. Except for the shiny brass. I never knew how much I hated the brass look, until this lamp. It's just so....shiny. I mean, just look at it. (And while you're at it, go ahead and adore my super awesome Aubie frame that the fiance got me when I graduated from Auburn. There's not much else I love more than Aubie. Except, maybe penguins).


Call me weird, I don't care. It just didn't go well with the rest of the living room decor in our future home. So, I asked him if it could be one of my projects, and much to my surprise, he didn't hesitate to tell me to have at it.


And needless to say, both of us (mainly me) are stoked at how it turned out. He's not real big on the flower I decided to add. Then again, he's not a girl. So I guess I can understand. Today's post is to show you how I did it. Because maybe you have a shiny brass lamp you don't want hanging around anymore. Who knows.

What I used:


A new lamp shade (size small)
Black ribbon
Black felt
 Pearls/beads
Black primer
Black satin spray paint
Scissors
Hot glue gun

How To:

The first thing I did was take off the lamp shade


This lamp had a harp but my new lampshade didn't require one. And I absolutely had no idea you could take it off until my father-in-law-to-be taught the fiance this nifty trick. Basically, you push up the two little pegs at the bottom and pinch in both sides until it comes off. Cool, eh?


And now, you have a regular lamp


I then took off the light bulb and taped the cord so I didn't accidentally spray paint it. And finally, it was time for the fun part. Spray painting! I did one coat of the black primer and then one coat of the black glossy. 


While I let that dry, I got busy on decorating the lampshade.


I also had to look up how to make the type of flower I wanted. I ended up finding my tutorial here and I printed out the template. Next, I traced the shapes onto my black felt with a silver pen and cut them out. I used the second largest template for my bottom petals and then cut one of each of the three smallest templates. After I cut them out, I used hot glue to layer them and used three pearls for my center. I used my black ribbon to add a trim to the top and bottom of my lamp and I just hot glued it down as I wrapped it around. The last things I did were hot glue my finished flower to the front and put the lamp shade on the base.

Funny story: While in the process of cutting my layers, the fiance didn't understand why I was cutting out clovers.  He said it looked like we were going for a morbid Irish theme. Just a word of advice - Don't ask for a male's opinion until the project is complete. They seem to have a hard time visualizing things.


We officially have a brand new lamp and I pretty much love it. And even if he won't admit it, I know the fiance loves it too. :)

Happy weekend!


Saturday, May 26, 2012

Happy Summer!


1 comment
Today officially marks the first day of my last summer ever. I cannot express the freedom I feel knowing I don't have to study a thing for three months. It's fantastic. In honor of my last summer, I've made a bucket list. For all of the things I want to do/accomplish this summer. And since I don't have a new craft to show you (yet), I'm sharing my extensive list with you!

Summer 2012 Bucket List

1. Plan a wedding

2. Take a day trip to Ikea in Atlanta
3. Disney World

4. Join a bowling league
5. Go to a shooting range
6. Lose 20 pounds

7. Finish a scrapbook
8. Start project 365 
9. Get tan

10. Start a journal
11. Redo my blog layout
12. Spend time with family


13. Get published
14. Learn to sew
15. Learn new cupcake decorating techniques

16. Bachelorette party!
17. Have cookouts
18. Visit Auburn

19. Read a new series
20. Organize everything


And last, but not least. 
Happy summer and happy weekend!


Thursday, May 17, 2012

DIY Bookshelf Upcycle


10 comments
Pin It
I have officially finished my big project! And by big, I just mean that it's the biggest project I've ever done. When the fiance moved into our apartment, we ended up getting two new bookshelves and couldn't decide what to do with his old one. My dad suggested using it in our kitchen since we don't have much storage space. It turned out to be a fantastic idea on his part. We really wanted to find a hutch or something similar with some cabinet space, but it ended up not being in our budget right now. Since we're both on med school salaries and all.
It was looking a little on the dingy side and the wood laminate look just wasn't cutting it in the kitchen. So, I decided to redo it. 

See what I mean: 


Mom gave me some old black paint they had stored in the garage a few days ago and after finding out the paint under our sink wasn't white like I originally thought, the black ended up saving the day! I bought a $7 can of primer, a few sheets of pretty paper to match the other decor in the kitchen, a roller, and two plastic paint holders. The primer I bought was fantastic because it didn't require that the bookshelf be sanded beforehand.


The first thing I did was take the back off.  It was just a piece of flimsy cardboard so it was pretty easy to get off.

The next thing I did was prime the entire piece. One coat was sufficient.

While it dried on the balcony, I went ahead and ModPodged the papers to the backing I pulled off in my first step. I was worried that the lines would show where I put the pieces together, but it doesn't show at all. I was pleasantly surprised! I also did a coat of Mod Podge on top.

Then I painted it with two coats of the black and nailed the backing on. And now I have a completely new bookshelf. Well, technically it's a pantry now.

I think Martha would be proud.

Also, I absolutely adore damask print!

Finished product:


I think my next project will be to work on some type of food storage system! Maybe some glass containers with some pretty labels? Hmmm. I'll keep brainstorming that one. 
Happy Thursday!


LinkWithin

Related Posts Plugin for WordPress, Blogger...