
I mentioned in my last post that I would have a tutorial post for you soon. Well "soon" meant not even 24 hours later. That's a surprise, huh? I know I missed last Tuesday's tutorial post but I'm back with a bang. Well, sort of, not really. I want to show you how to make the acrylic tumblers that I personalized for all my girls at my bachelorette party.

These were a perfect way for all of us to know where our cup was at all times. And, since they aren't glass, we were able to use them at the pool and the beach. Even more perfect, they didn't get sand in them. I got the inspiration from some I saw on Etsy and my original plan was to make them as part of my bridemaids' gifts. So, I started searching for cheap, clear acrylic tumblers and found that I could buy 6 somewhere else for the same price as 12 on Amazon. So, since I might as well get my money's worth, I bought the ones off of Amazon and decided to use them for the bachelorette party instead since there were more girls going than are in my actual bridal party.
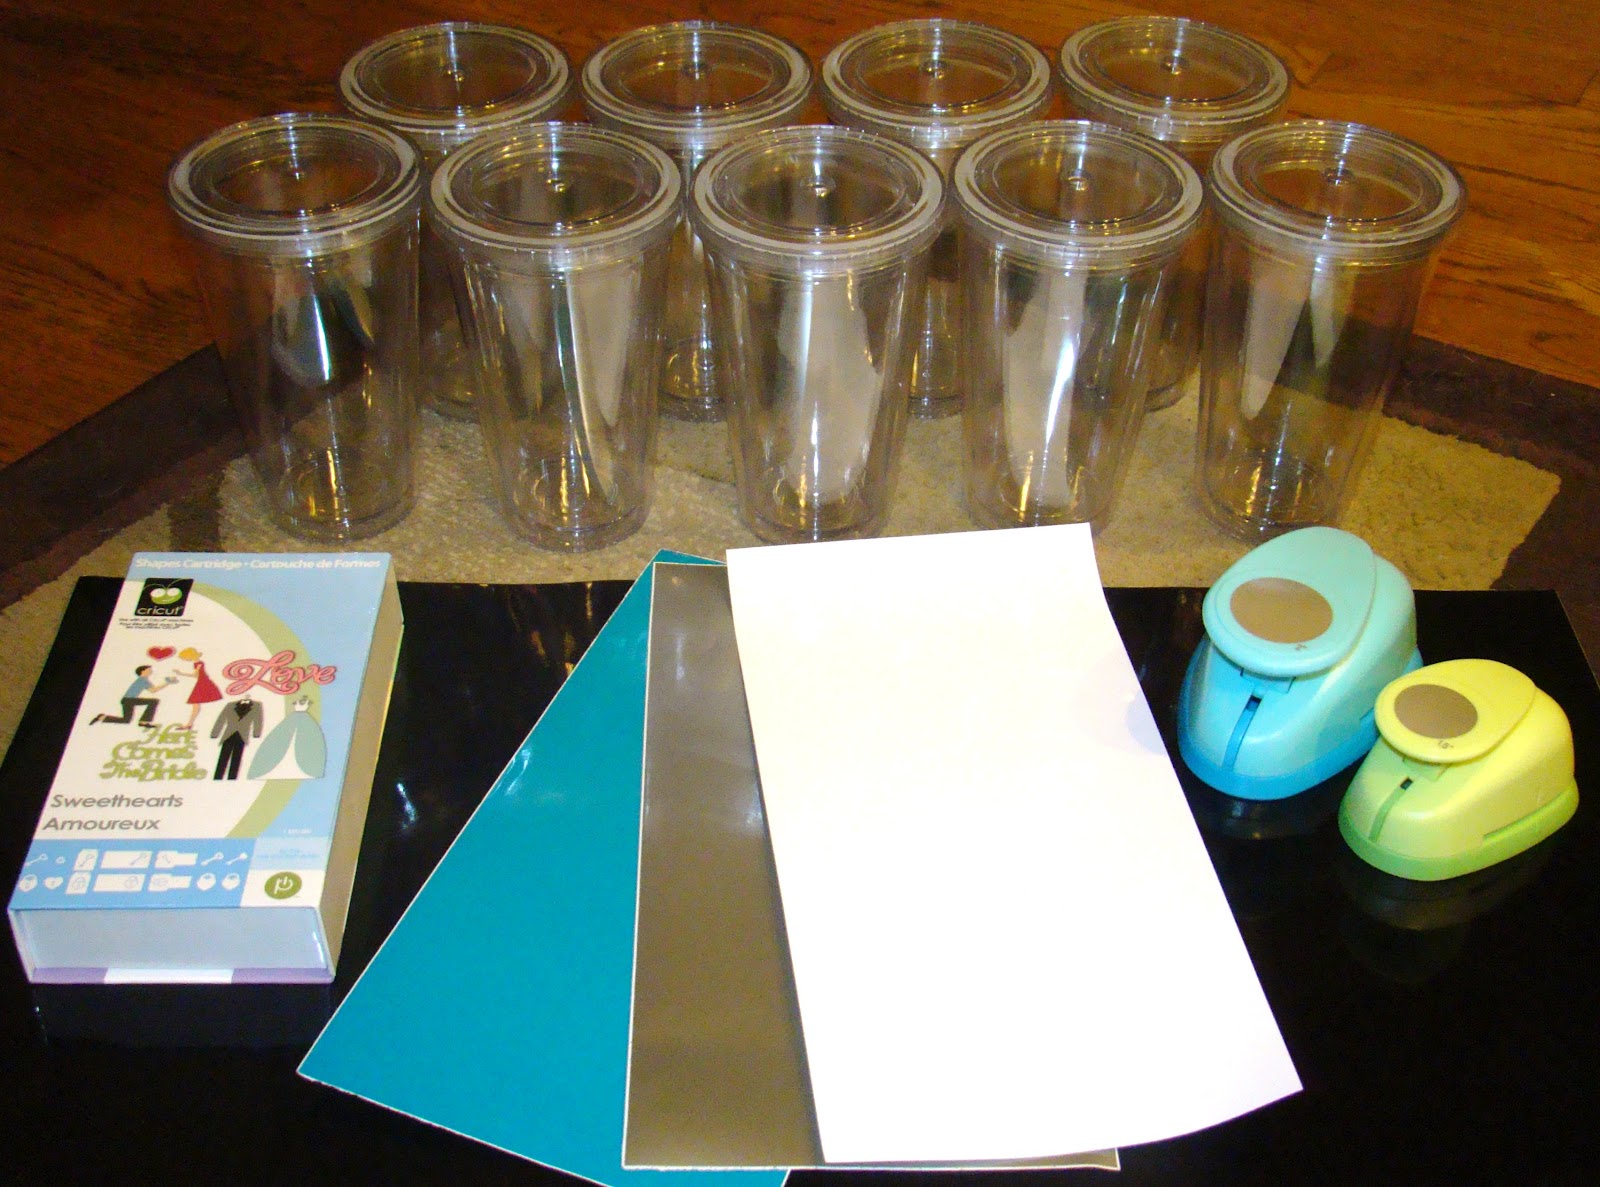
Here's what else I used:

9 Clear Acrylic Tumblers
Black Vinyl
Teal Vinyl
Silver Vinyl
White Vinyl
1" Circle Hole Punch
A roll of ribbon
Cricut, Font Cartridge, and Sweethearts Cartridge
*All of the vinyl was purchased at a local sign shop. It's so much cheaper than buying Cricut brand vinyl.
First, I washed the cups with soap and water. Then, I cut each of their names on the black vinyl using my Cricut and the font I so desired. Next, it was a matter of placing the letters of their names in the correct position. I really need to learn how to use transfer paper with the vinyl. I'm sure it would make my life much easier. After I had the letters down, I punched out a bunch of 1" circles using my hole punch. I used all four colors for the dots and filled them in around the rest of the cup. Then, I used my ribbon and tied a bow around each of the straws.
For my cup, I cut a 3" engagement ring using my Sweethearts cartridge and placed it on before putting my name on. (I know, I'm a huge nerd.) Seeeee.


Ta-da! There you have it, the finished product. That's all I have for today dear friends. Have a wonderful week!

These were a perfect way for all of us to know where our cup was at all times. And, since they aren't glass, we were able to use them at the pool and the beach. Even more perfect, they didn't get sand in them. I got the inspiration from some I saw on Etsy and my original plan was to make them as part of my bridemaids' gifts. So, I started searching for cheap, clear acrylic tumblers and found that I could buy 6 somewhere else for the same price as 12 on Amazon. So, since I might as well get my money's worth, I bought the ones off of Amazon and decided to use them for the bachelorette party instead since there were more girls going than are in my actual bridal party.
Here's what else I used:
9 Clear Acrylic Tumblers
Black Vinyl
Teal Vinyl
Silver Vinyl
White Vinyl
1" Circle Hole Punch
A roll of ribbon
Cricut, Font Cartridge, and Sweethearts Cartridge
*All of the vinyl was purchased at a local sign shop. It's so much cheaper than buying Cricut brand vinyl.
First, I washed the cups with soap and water. Then, I cut each of their names on the black vinyl using my Cricut and the font I so desired. Next, it was a matter of placing the letters of their names in the correct position. I really need to learn how to use transfer paper with the vinyl. I'm sure it would make my life much easier. After I had the letters down, I punched out a bunch of 1" circles using my hole punch. I used all four colors for the dots and filled them in around the rest of the cup. Then, I used my ribbon and tied a bow around each of the straws.
For my cup, I cut a 3" engagement ring using my Sweethearts cartridge and placed it on before putting my name on. (I know, I'm a huge nerd.) Seeeee.


Ta-da! There you have it, the finished product. That's all I have for today dear friends. Have a wonderful week!


Nicely done. I saw your post on Coastal Charm. :) Just FYI --- I have had a lot of really good luck with using Glad Press'n Seal paper as transfer paper. It is much cheaper than "real" transfer paper, and it works like a charm. Anyway, these cups are super cute gift ideas! Thanks for sharing.
ReplyDeleteThanks for the sweet comment and awesome suggestion! I will absolutely try that since I already have some on hand!
DeleteWhat did you use to adhere the vinyl letters to the cup?
DeleteI actually just did each letter separately and put them on with my hands! Talk about doing it the hard way!
Deletebut how do you get them to stay on? Im confused on the transfer paper part... you cut the letters out then placed them on the cup but what exactly do you do to make them stay on? Thanks
DeleteI am taking it that the vinyl has adhesive on the back side to adhere to the cup? My question is that when you are finished and it is time to wash them have you had the vinyl come up off the cup, start to peel off? I am also guessing that this is a hand wash item and not a dish washer item?
Deletekayla please answer the above question.....does the vinyl stay on after the cups are washed? or do you but some type of sealant?
DeleteYou want to buy permanent vinyl. Make sure when u adhere vinyl to any item (glass, acrylic, aluminum, etc) there are NO air bubbles. Push them all the way out, whether using your fingers or transfer tape. If using your fingers be sure NOT to touch adhesive backing as much (the less you touch it the better). HAND WASH ONLY (although some ppl say they have placed them in a dishwasher) Be creative & start w/ cheaper items. Sometimes personalized items are not gonna be completely straight, its ok, that's part of them being handmade & unique. Remember have FUN, FUN, FUN... BE CREATIVE... USE PERMENANT VINYL. GOOD LUCK CRAFTERS
DeleteThese look great!
ReplyDeleteThank you so much!
DeleteLove your blog!
ReplyDeleteThanks Cindy! :)
DeleteThey would absolutely make perfect gifts :) And thank you so much!
ReplyDeleteLove this idea! Made a few of these for the mom's on my son's Allstar baseball team but the wording ended up curling in a downward U... yours look amazing! I'd love to have you stop by tomorrow and link up to my party... tip toe thru tuesdays! I'm your newest follower Too!
ReplyDeleteKim
Thanks Kimberly! Following you back! Sad to hear your wording messed up. I will definitely stop by tomorrow! Thanks for the invite :) Have a great week!
ReplyDeleteThese are wonderful! I love how they turned out. Thanks so much for sharing on Tout It Tuesday! Hope to see you tomorrow.
ReplyDeleteThank you so much! And thank you for hosting :)
DeleteSuper cute!! You did a great job! I don't know how to use the transfer paper either. LOL
ReplyDeleteThank you! And I'm so glad I'm not the only one! ;)
DeleteI'm wondering how the vinyl held up to washings?
ReplyDeleteHey Dani! The vinyl has held up pretty well. I have only hand-washed it though. But, so far so good! I've read that as long as you use outdoor purpose vinyl, then you shouldn't have any problems!
DeleteDo you have some more unique collection for Send gifts to Pakistan to my friends? Your collection is nice. but, I want some other collection.
ReplyDeleteWhat circuit cartdrige did you se for the names?
ReplyDeleteI actually did not use a Cricut font. I have a font cutting program that uses any TrueType font but it only works on the Cricut Personal. This font is called Lobster 2.
DeleteHow did you make the vinyl stick to the cup? What type of adhesive did you use?
ReplyDeleteThe vinyl is actually like a sticker so no adhesive was needed!
DeleteWhat brand vinyl?
ReplyDeleteVanessa, I used vinyl from a local sign shop! Also, the letters are outside of the cup, not inside! Hope that helps.
DeleteAnd also are the letters inside the cu p?
ReplyDeleteHey Vanessa! Sorry it's been so long. The letters were on the outside of the cups.
DeleteWhere did you get the tumblers? Thanks!!
ReplyDeleteAmazon! Sorry for the serious delay in response!
DeleteHow many sheets of vinyl did you use and what would you say your price per cup was. Not trying to be to nosy but I am looking to start a small at home business and these cups are so popular now. My very type A hubby needs a cost analysis on an excel spreadsheet;) before we purchase anything.
ReplyDeleteI honestly don't even know how much I spent for everything anymore. If I had to guess, it was probably about $4 a cup. I bought big sheets of vinyl at a local sign shop and only needed one!
DeleteDollartree.com........24 tumblers for $24!!!! ;)
DeleteWhat cutting tool did you use to cut out the letters for the names?
ReplyDeleteI used my Cricut!
DeleteBrilliant post and useful information…I think this is what I read somewhere…but I don’t know with your experience
ReplyDeleteCan you use a permanent marker to write on an acrylic tumbler?
ReplyDeleteAfter I had the letters down, I punched out a bunch of 1" circles using my hole punch. I used all four colors for the dots and filled them in around the rest of the cup. Then, I used my ribbon and tied a bow around each of the straws. vinyl lettering
ReplyDeleteDoes the vinyl stay on permanently?
ReplyDelete