Showing posts with label painting. Show all posts

Tuesday, November 13, 2012

Tutorial Tuesday #9: Bridesmaid Totebags


No comments
Pin It
I am so excited I can finally sit down and blog again. I am also super excited I get to share my first tutorial in forever today! I still have a lot of wedding projects that I never got to share, so don’t be surprised if that’s what most of my tutorials are for a while. Oh, and Christmas crafts. 
Today I want to share with you one of my favorite projects from the wedding. And funny, it wasn’t even a decoration. These were actually my bridesmaids’ gifts.I made a lot of handmade things for my gifts to try to keep it cheap. Because let's be honest, weddings are a rip-off. 


How I did it was really easy but a little time consuming. 
Here's what you need to make your own tote bag

Supplies:


Blank linen tote bag (Hobby Lobby)
Fabric Paints or Acrylic Paints (In whatever colors your heart desires) and Fabric Medium
Masking Tape
Ruler
Freezer Paper
Cricut or X-acto knife and Monogram Template
Foam Brushes

Instructions

1. I taped my bags front and back to make stripes. I used my ruler to help guide where I put the tape and I made my stripes an inch long. You could do any pattern you wanted really, but stripes seemed easiest to me. *Also, make sure you put paper inside of the bag to keep the paint from bleeding through.


2. I mixed 1 part fabric medium and 1 part acrylic paint (brown) and painted my stripes. I ended up doing two to three layers. But be careful, because the tape likes to buckle once you start painting. 
3. After the stripes dried, I took all the tape off. 
4. To make my monogram, I used the same technique as in my Muggle T-shirts and my Keep Calm T-shirts. 


5. I tied a large ribbon around each of them and a stamped "handmade for you" label. 


6. I filled the tote bags with a homemade pumpkin body scrub (recipe found here), a pair of brown flip flops, a hanger I made for each of them, and a makeup bag I had monogrammed with each of their initials. The makeup bag had some of my favorite things in it. Examples - Lipgloss, Essie nail polish, sunglasses (the ones we wore in the pictures), nail polish remover, a small candle, and some other stuff I can't remember. 


And there you have it. My bridesmaid totes. And just for the record, these would be great gifts for any occasion! Not just weddings ;) Hope everyone had a great Tuesday!


Tuesday, August 7, 2012

Tutorial Tuesday #8: More Upcycle Frames


1 comment
Hey again! Today's post isn't anything very special. In fact, I shouldn't even label it a tutorial. I've been working on more wedding stuff, mainly gifts, but I can't post about them quite yet! I'm pretty sure I mentioned in my last upcycled frame post that I had a bunch of other regular photo frames to use for the wedding that I wanted to spray paint brown. Well, I finally am getting around to posting pictures of those.

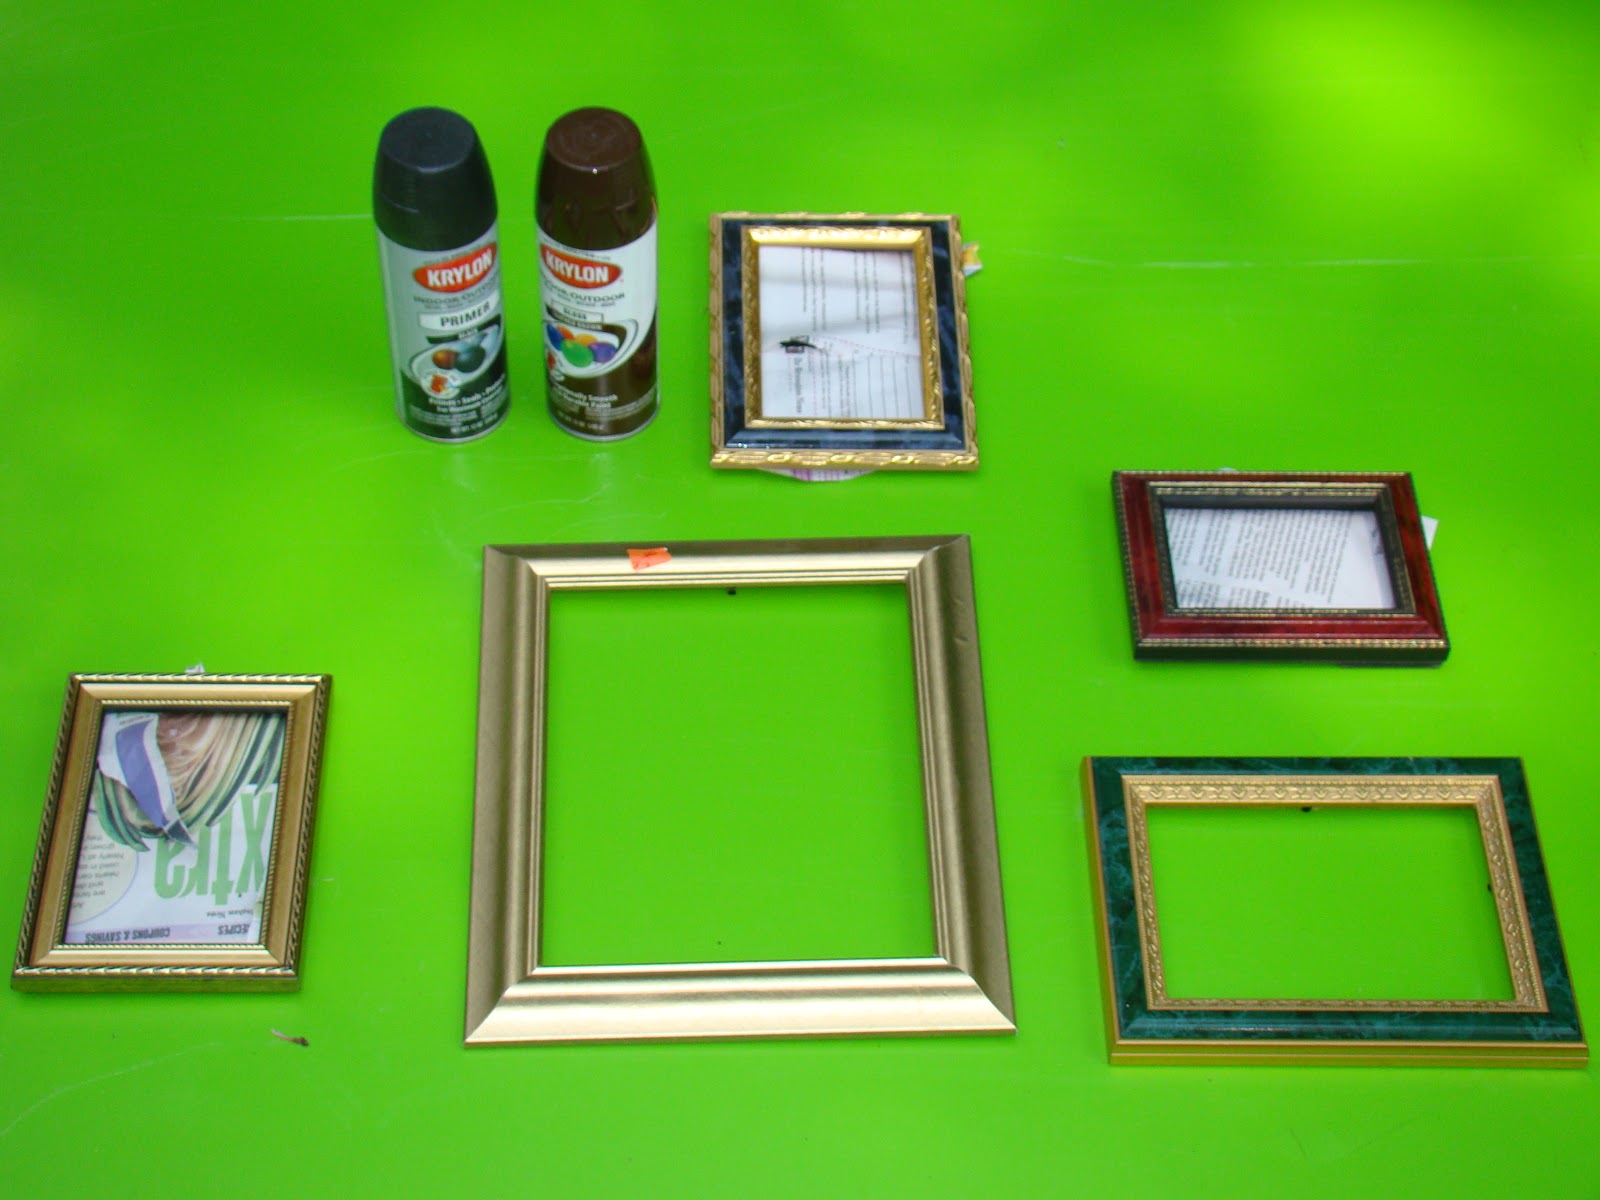
Basically it started with a bunch of $0.39-$0.59 thrift store frames that looked like this


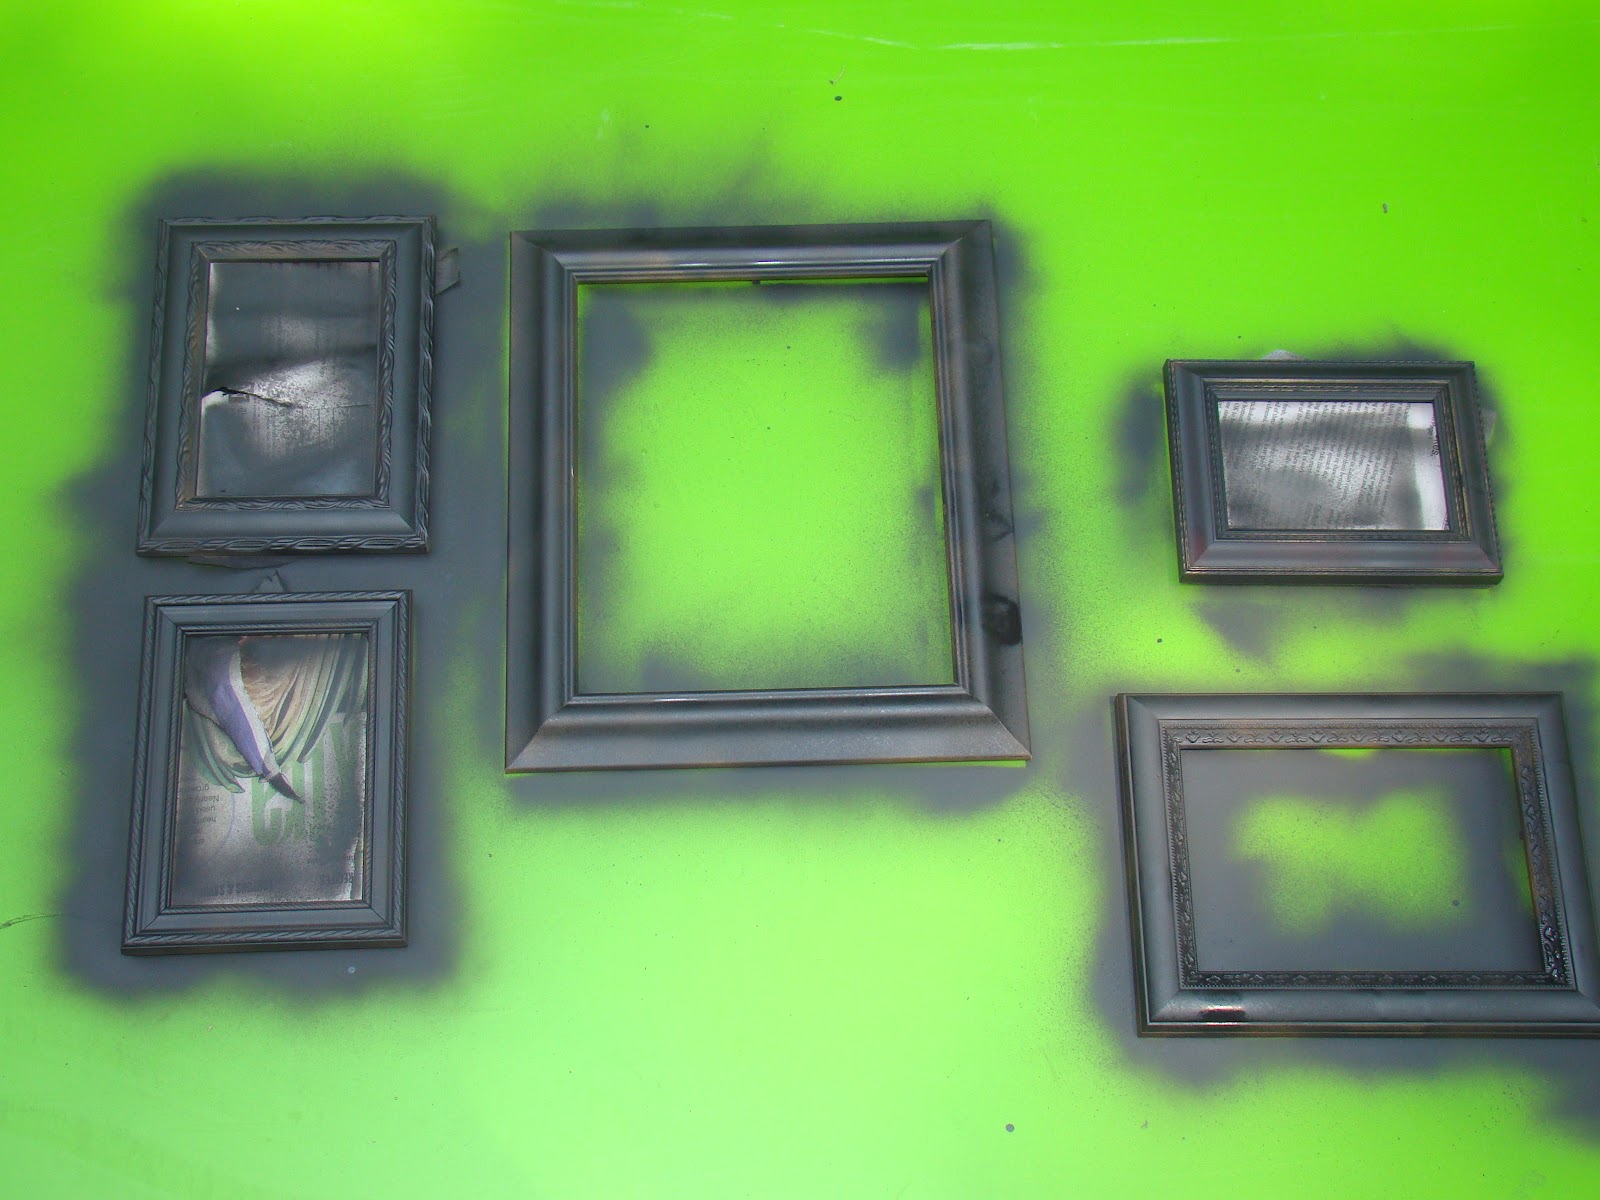
I tried really hard to pick out frames with some sort of detail around them because it just looks a lot nicer to me. I first sprayed them with gray primer. Notice how spotty it looks? Yeah, well that's because I ran out of the primer. I'm pretty sure I used up every last drop.


The last thing I did was spray them with 2 coats of Krylon "Brown Leather."  I added some of our engagement photos and I now have some more decor for the wedding!


Just 66 more days to go! Hope everyone has a wonderful rest of the week!


Tuesday, July 24, 2012

Tuesday Tutorial #7: Upcycled Sandals


19 comments
Today's tutorial was very much inspired by a shopping trip. The other day I was out looking for wedding shoes at Macy's. But, being the shoe fanatic I am, I obviously got side-tracked by all the other cute shoes. I came across these flip flops and wanted to try them on. 


Sadly, they didn't have my size. And truth be told, I didn't have the money. Even if they were on sale. So I went about my hunt for wedding shoes. And didn't find those there either. Although, I did end up finding some later. But that's irrelevant. I got home and it hit me that I had some super old T-strap sandals that I hadn't worn in a while and I had fabric to make some bows. So, using a technique I had used before, I set out to make my own version of these sandals. Here's how mine turned out.


I obviously could never take photos for Macy's online shoe department. But whatever. I think they turned out well, despite the dirty label and visible foot print from being worn so much.

Here's what I used and how I did it


Old T-straps
Fine glitter
ModPodge
Paint brush
E-6000 glue
Fabric

First, I mixed together a little ModPodge and about half of the bottle of Martha Stewart glitter into a small bowl.  I then painted on four coats of the mixture and let each coat dry in between.


While the coats of the ModPodge mixture were drying, I made my bows using the same tutorial I used for my bow shoe clips.  Once all my coats had dried and my bows were made, I used a little E6000 to adhere the bows to the front. And viola! My own version of the Macy's sandals. I think they turned out rather charming (even if they are a little beat up!) 


Well, that's all I have for today! Hope everyone has had a wonderful Tuesday. Thanks for stopping by! :)


Saturday, July 7, 2012

Thrifted Frame Makeover


2 comments
Like I said before, I have been wedding crazy lately. Therefore, I've been running lots of errands and popping out lots of projects. As one of my wedding stops, I decided to try the thrift store to see if there was anything I could make something from. My main idea was to look for frames that I could use to hold our engagement photos and have them sit around the venue. And boy was I in luck. I found a bunch of different sized frames that had cool detail and all I had to do was spray paint them brown. I'll have pictures of those eventually. 

As I kept searching the shelves, I came across this super cool frame! 


It was pretty dingy and dusty, but nothing a little spray paint can't fix.  Plus, it was only 3 bucks and I had the perfect idea of how to use it.

Like I've said before, we are having a photo booth at the wedding. (Thanks to dad!) Not to mention, I've already shown you some of the props I've made for it. Here and here. I decided this frame would be perfect to use as a chalkboard to just "display" the photo booth. 
Kind of like this one. 


Except, this is mine 


It really doesn't look like I did anything to it, but I promise I did. It desperately needed a new coat of paint.
 Before I did anything, I took off the back and the glass. I was slightly taken aback when I saw I needed a screwdriver to take the back off. I have never seen that on a frame. Maybe I just don't get out much. 


I then took some ivory spray paint and went to town on the frame. 

To make it a chalkboard, I cleaned off the glass piece and used 2 coats of my chalkboard spray paint. This turned out to be disastrous on the first try. While it was drying, the wind decided to blow really hard causing all of my newspaper to fly up and hit the freshly painted glass, leaving streaks and chunks of paper stuck to it. Epic fail. However, I accidentally found out one time that Goo-Gone takes off spray paint. Who knew? So, I decided to start over. I took my messed up glass, soaked it with Goo-Gone, and started scrubbing. (FYI, this was done over the bathtub). It worked great getting it off the glass...but then I had another problem. It was now all over the bottom of the bathtub. And my hands. And my arms. I felt like I was in the Cat in the Hat. You know that scene, where the kids can't get rid of the pink junk? Yeah, that. It was miserable. But thankfully it eventually all went away and I was able to try spraying it again. In this case, the second time was a charm!


I also absolutely adore the detail on this frame. And I could not be more excited that we are officially down to the double digits! Happy weekend!


Tuesday, July 3, 2012

Tutorial Tuesday #5: Wedding Favor Tin


5 comments
Pin It
It's Tuesday and you know what that means! Another tutorial. As the wedding creeps closer, there are 1000 more things added to my to do list for every one I scratch off. I feel like I'm drowning in all things wedding. As many times as people have volunteered to help me with my extensive list of wedding crafts, I should have already jumped on that. I'm finding that my A-type personality and my crafting OCD are hindering my ability to take up peoples' offers. I really need to let go of my perfectionist personality. It doesn't seem to be working for me anymore.

As for this week's tutorial, I had some inspiration. It's something I saw on Pinterest that I thought would work perfect as a favor holder at the wedding. It's a monogrammed galvanized tin. :) 


We decided to do bubbles for our "getaway" and I figured a tin bucket would work perfect to hold these babies! I'm so excited with how it turned out. And like I mentioned before, this had some inspiration. I'm sure you've seen it floating around Pinterest.


Here's what I did to make mine.
Supplies:

Cheap galvanized tin
Spray paint in color of choice
Wired ribbon
Vinyl in color of choice
*Cricut


I found this cheap tin in the party supplies at Wally World and I used Krylon Dual Paint and Primer so I didn't have to prime it first. It worked surprisingly well! Have I mentioned how much I love spray paint. It pretty much fixes everything. I spray painted it with two coats and I did the outside and inside. 


I used my wired ribbon to tie a bow to each handle. I'm really not the best bow-tier. 


The last thing I did was cut a monogram "K" out of my vinyl with my Cricut. Making sure I put the K on straight was the hardest part. I required an extra helper to make sure all the loops didn't stick together before I got it all the way on the tin. 


And there you have it. Another Tutorial Tuesday has come and gone!
Happy crafting!


Tuesday, June 19, 2012

Tutorial Tuesday #3: DIY Kitchen Decor


11 comments
Pin It

Another Tuesday is here yet again. Summer is going way too fast. Today's project was supposed to be last weeks. I finally got around to going back to WalMart to get hooks to hang these babies. Also, this project is so simple, I almost feel like I'm cheating you. So instead, I'm going to tell you how I made both parts to my kitchen wall decor.


The EAT was ridiculous how simple it was. It honestly shouldn't even count as a craft because I don't feel like I did anything. Basically, I went and bought 3 chipboard letters at the Hobs Lobs, used some black spray paint I already had, and sprayed away. I think the hardest part was waiting for it to dry. Sad, right?


I used a small sawtooth photo hanger on the back of each letter and hung them with a nail to give my final project.


The framed silverware was a project I found and completed a little over a year ago when I was first getting started with my crafting obsession and hadn't started medical school yet. It was right after Pinterest had first gotten started and I pretty much made every little craft I could find. Literally. I did two months of "a craft a day." You know, sort of like everyone does that "photo a day" thing. Now I don't have the time or the money for that. Sad day.
But, back to the framed silverware. I bought 2 forks, 2 spoons and 2 knives at the dollar store and spray painted them red. I did the same thing to the frames tht were also snagged from the dollar store. I bought 8.5"x11" damask scrapbook paper and glued it to the cardboard back that came with the frames. I used some E6000 to glue down the silverware to the paper and it's been holding steady ever since. I wish I had thought to spray the paper with some sealant before gluing down the silverware, but I guess it wasn't crucial since they still look as good as the day I made them.


And there you have it. Another Tutorial Tuesday has come and gone! Hope everyone has a great week. Happy crafting!


Tuesday, June 12, 2012

Tutorial Tuesday #2


4 comments
Pin It
Happy Tuesday everyone! This is only my second Tutorial Tuesday and I already almost started slacking. The original project I had planned for today still needs to be hung so I can take pictures of it.  What's sad is that I was just at Wal-Mart today and didn't remember to get something to hang it with. But hey, if that's the only thing I forgot, I feel like I'm in pretty good shape. Today's new project was, of course, inspired by the one and only Pinterest. Lately, I've been admiring the millions of ways people have come up with to recycle their old wine bottles and I wanted to jump on the bandwagon to make vases for my kitchen. Seeeee?


There was only one problem, though. I don't buy wine so I didn't have old wine bottles. I ended up finding the perfect solution to my wine bottle woes! The grocery store sells glass bottled water for about a dollar a piece! Score. I did get some funny looks for buying glass bottled water though. Someone even asked me if it tastes different than regular water....
 

So, I drank the water, took off the labels (with Goo-Gone), and then got to crafting. And for those wondering, it tasted like regular water ;)


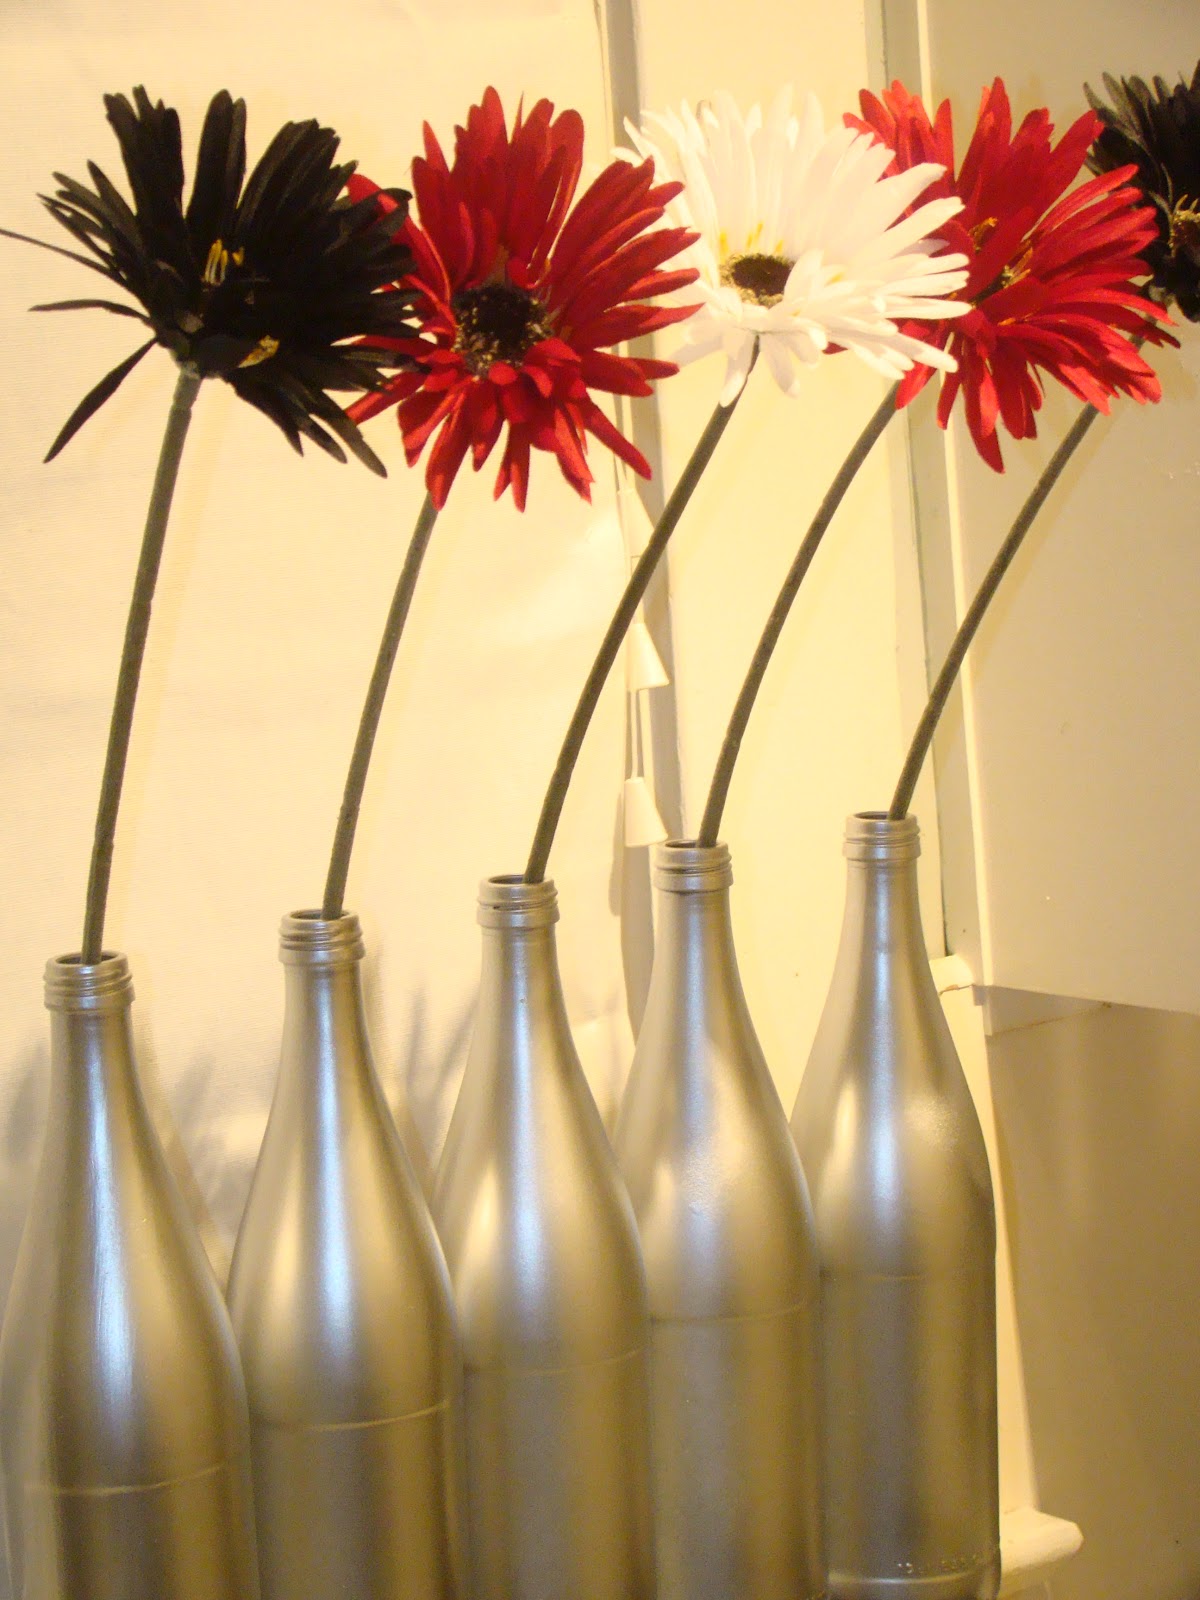
I decided these would look perfect as vases on top of our kitchen cabinets. There's nothing up there except some dust and it was just another way to spice up the kitchen. So, I spray painted them to match.


I first primed them with black primer.

Then, I spray painted them with a metallic finish. Metallic is always fun.


And there you have it, "wine bottle" vases. Easy peasy and not quite as creative as some of the others on Pinterest. Eh, whatever.


And this is their new home :)

I kind of love them. Except, the first time I walked into the kitchen after putting them up there, it kind of scared me because I forgot they were there. 

Hope everyone's having a great week! :)


Tuesday, June 5, 2012

Tutorial Tuesday #1


8 comments
Pin It
So, I've decided to try a weekly theme to help me stay motivated to update my blog and give it a little more organization. It may also help me branch out and post about things other than just crafts. I mainly hope this helps when school starts back in August. But for now, I don't want to think about school. As you can see, today is my first "theme" - Tutorial Tuesdays. Since this was kind of a spur the moment idea, today's tutorial isn't anything special. In fact, I've actually already done it before with my Muggle T-shirts. 

The BFF and I spent the last 2 weeks of school before summer making and re-making our summer bucket lists. We're slightly crazy, we know. The biggest thing on our bucket list was crafting, crafting, and more crafting. (Remember the last item on my summer bucket list post?) Mainly because we spent so much of our study time whining about how we would rather be crafting. So, here's to getting it out of our system. 

After deciding our whole summer would be spent crafting, we also decided we needed appropriate T-shirts for the occasion. Why? Because we are super duper cool. That's why. See?


We got the inspiration from all of the "Keep Calm" posters always seen on Pinterest and in the blog world and used the same technique as my Muggle shirts I made for the Harry Potter and the Deathly Hallows Part 2 premiere.  We were actually able to find and downloaded the Keep Calm font. I then used my Cricut and the Sure Cuts a Lot software I have on my computer. The only problem with this is that the SCAL only works with the hardware on the Cricut Personal (the first one ever made). Although, this was much easier than printing it out and cutting the font with an X-acto knife, the X-acto knife method will still work, but will require much more patience. Then we ironed the words on and went to painting.


And these were our final results!


I think we are all set to craft away the summer. What do you think?
Happy Tuesday!!


LinkWithin

Related Posts Plugin for WordPress, Blogger...